Robot build phase 1: D-Robotics RDK S100P setup
· main-author
The RDK setup phase of the robot build is complete, with the D-Robotics RDK S100P and all phase 1 components connected and running. The built-in startup experience of the RDK is a fully configured Ubuntu desktop environment with plug-and-play ethernet, USB peripheral support, and the RDK configuration tool already installed. Most of the setup time was spent configuring third-party drivers, and setting up networking for software updates and remote access.
Tasks performed in this phase:
- Start the RDK
- Test peripherals
- Set up networking
- Update software and drivers remotely
- Run the RDK configuration tool
Components added this phase:
- D-Robotics RDK S100P
- PeakDo 7-inch portable touch-screen display
- SEED Studio RTL8822CE M.2 module
Backup components:
- Panda Wireless PAU0F Wi-Fi USB module
- USB mouse and keyboard
Documentation center topics:
Setup tips §
- RDK power cable: Make sure to get the correct power cable for your region, so you can plug in the RDK’s power adapter. The adapter might come with a power cable most commonly used in China.
- Wired peripherals: Don’t rely solely on remote RDK access. There will be times when you need a USB mouse and keyboard, plus a standalone display for direct access to the RDK.
- Network restrictions: Consider the limitations of your network when choosing the initial type of network connection to use. For example, internet connection sharing may be blocked, router access might be unavailable, and there might not be any ethernet ports in your office. For more information, see the Network connectivity section.
- Remote access: The Remote access section lists the default user accounts and the static IP address you can use to access the device.
- Linux packages: The RDK has a streamlined version of Ubuntu optimized for robotics. Only install specific tools you need to deploy and run software on the RDK. When possible, offload tools to your dev machine.
Power adapter §
The power adapter for the S100P comes with a removable Type I power cable used in China. For this build, the cable was replaced with a Type B (NEMA 5-15-P) power cable used in North America.
Peripherals §
Phase 1 uses a minimal set of peripherals for direct interaction with the RDK. Most development and management tasks happen remotely over SSH or a remote desktop session, but a display, mouse, and keyboard are still essential when remote connectivity isn’t available. This is often the case during initial network setup, or when troubleshooting connectivity issues.
Main display §
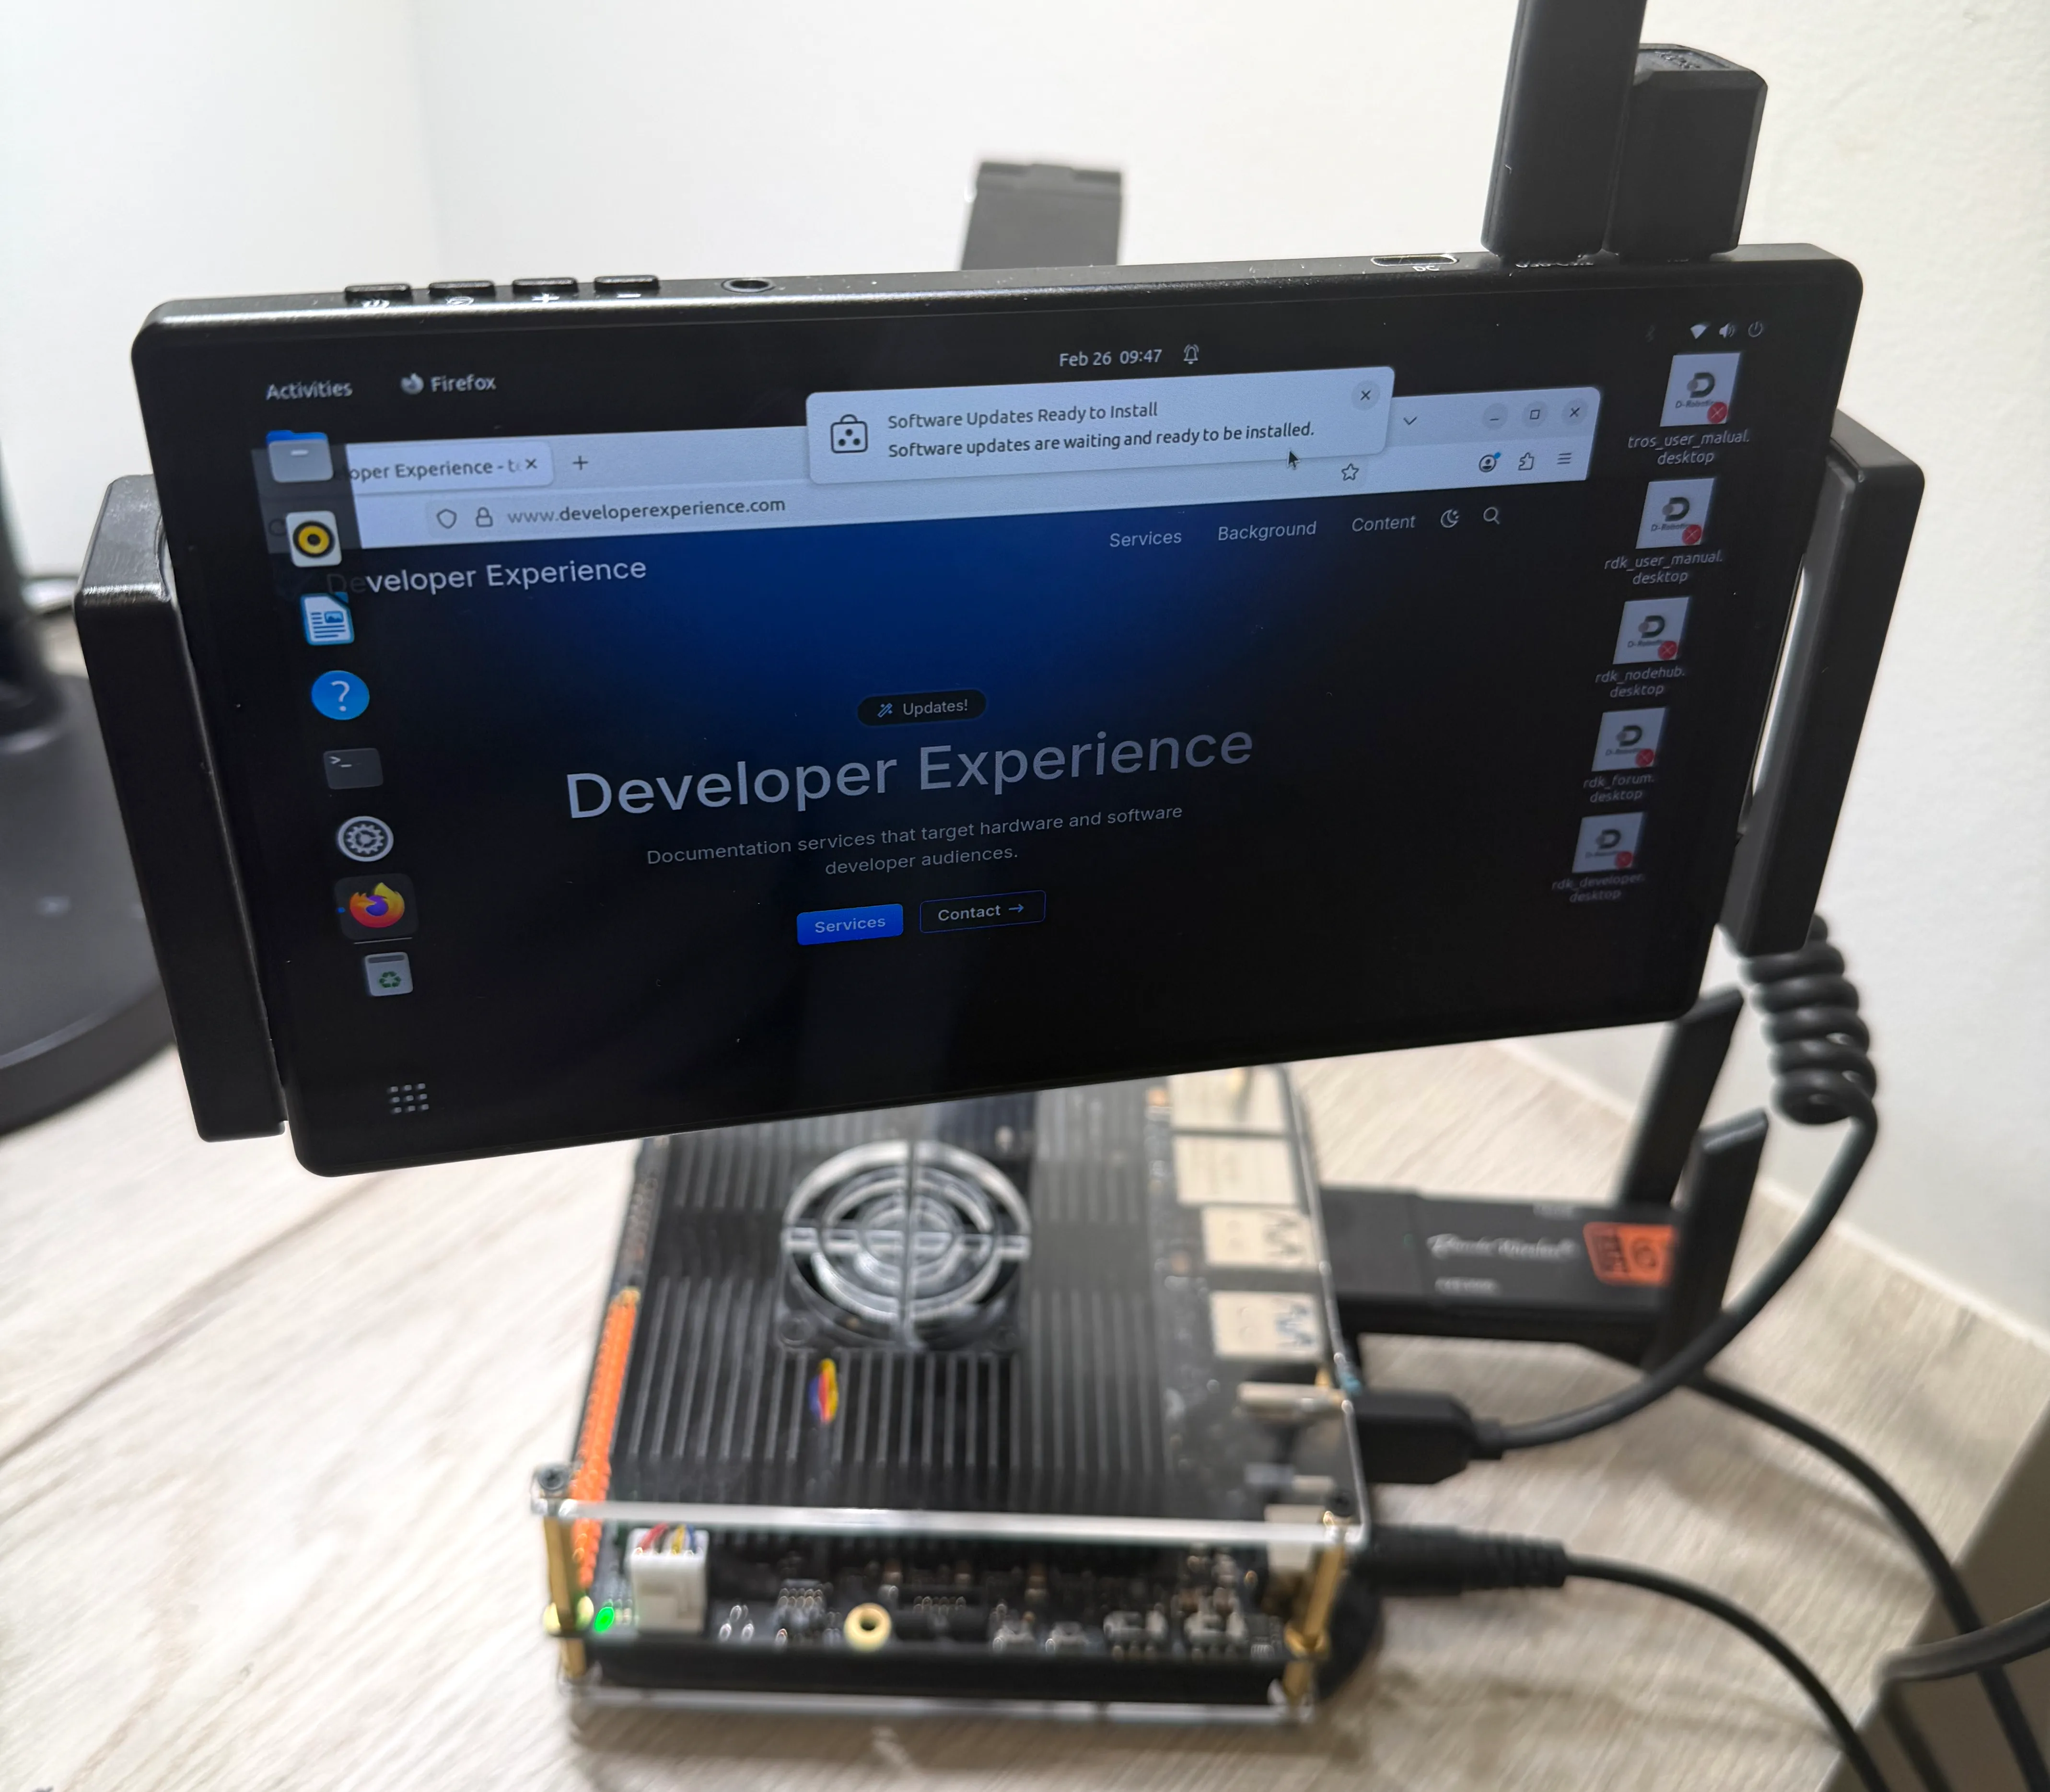
The PeakDo 7-inch portable touch-screen displays the output and avatar of the robot. It also provides backup touchscreen input, which allows you to control the UI without any peripherals connected and without a network connection.
When using this display to navigate the OS, we had to increase the text and UI size for readability. A 7-inch display is too small to comfortably perform tasks directly on the robot for long periods of time, so for more involved tasks, we use remote access or an external monitor.
Cables:
- HDMI to mini HDMI for video
- HDMI-C to USB-A for power
Network connectivity §
Networking is one of the most important aspects to consider before setting up the RDK S100P. Dev machines need local network access to the RDK, and the RDK needs internet access to update and possibly use software. Additionally, inter-office travel might require more than one connection type.
This build uses multiple connection types based on these scenarios:
| Usage | Network connection | Tradeoffs |
|---|---|---|
| Initial RDK setup | USB Wi-Fi adapter | Great mobility, but no built-in drivers, requires a USB port, and takes up external space. |
| Dev and management tasks | Connection sharing via ethernet | Easiest solution with built-in drivers and no router access needed, but poor physical mobility, dependent on a dev machine, and can be restricted on some networks. |
| Autonomous operation at later development stages | M.2 wireless module | Great mobility with built-in drivers, but the device is not included and antennas need a mounting surface. |
| Inter-component communication at later development stages | Direct ethernet | Best performance with built-in drivers, but poor physical mobility, must be near an ethernet port, and setup might require access to router settings. |
USB Wi-Fi adapter §
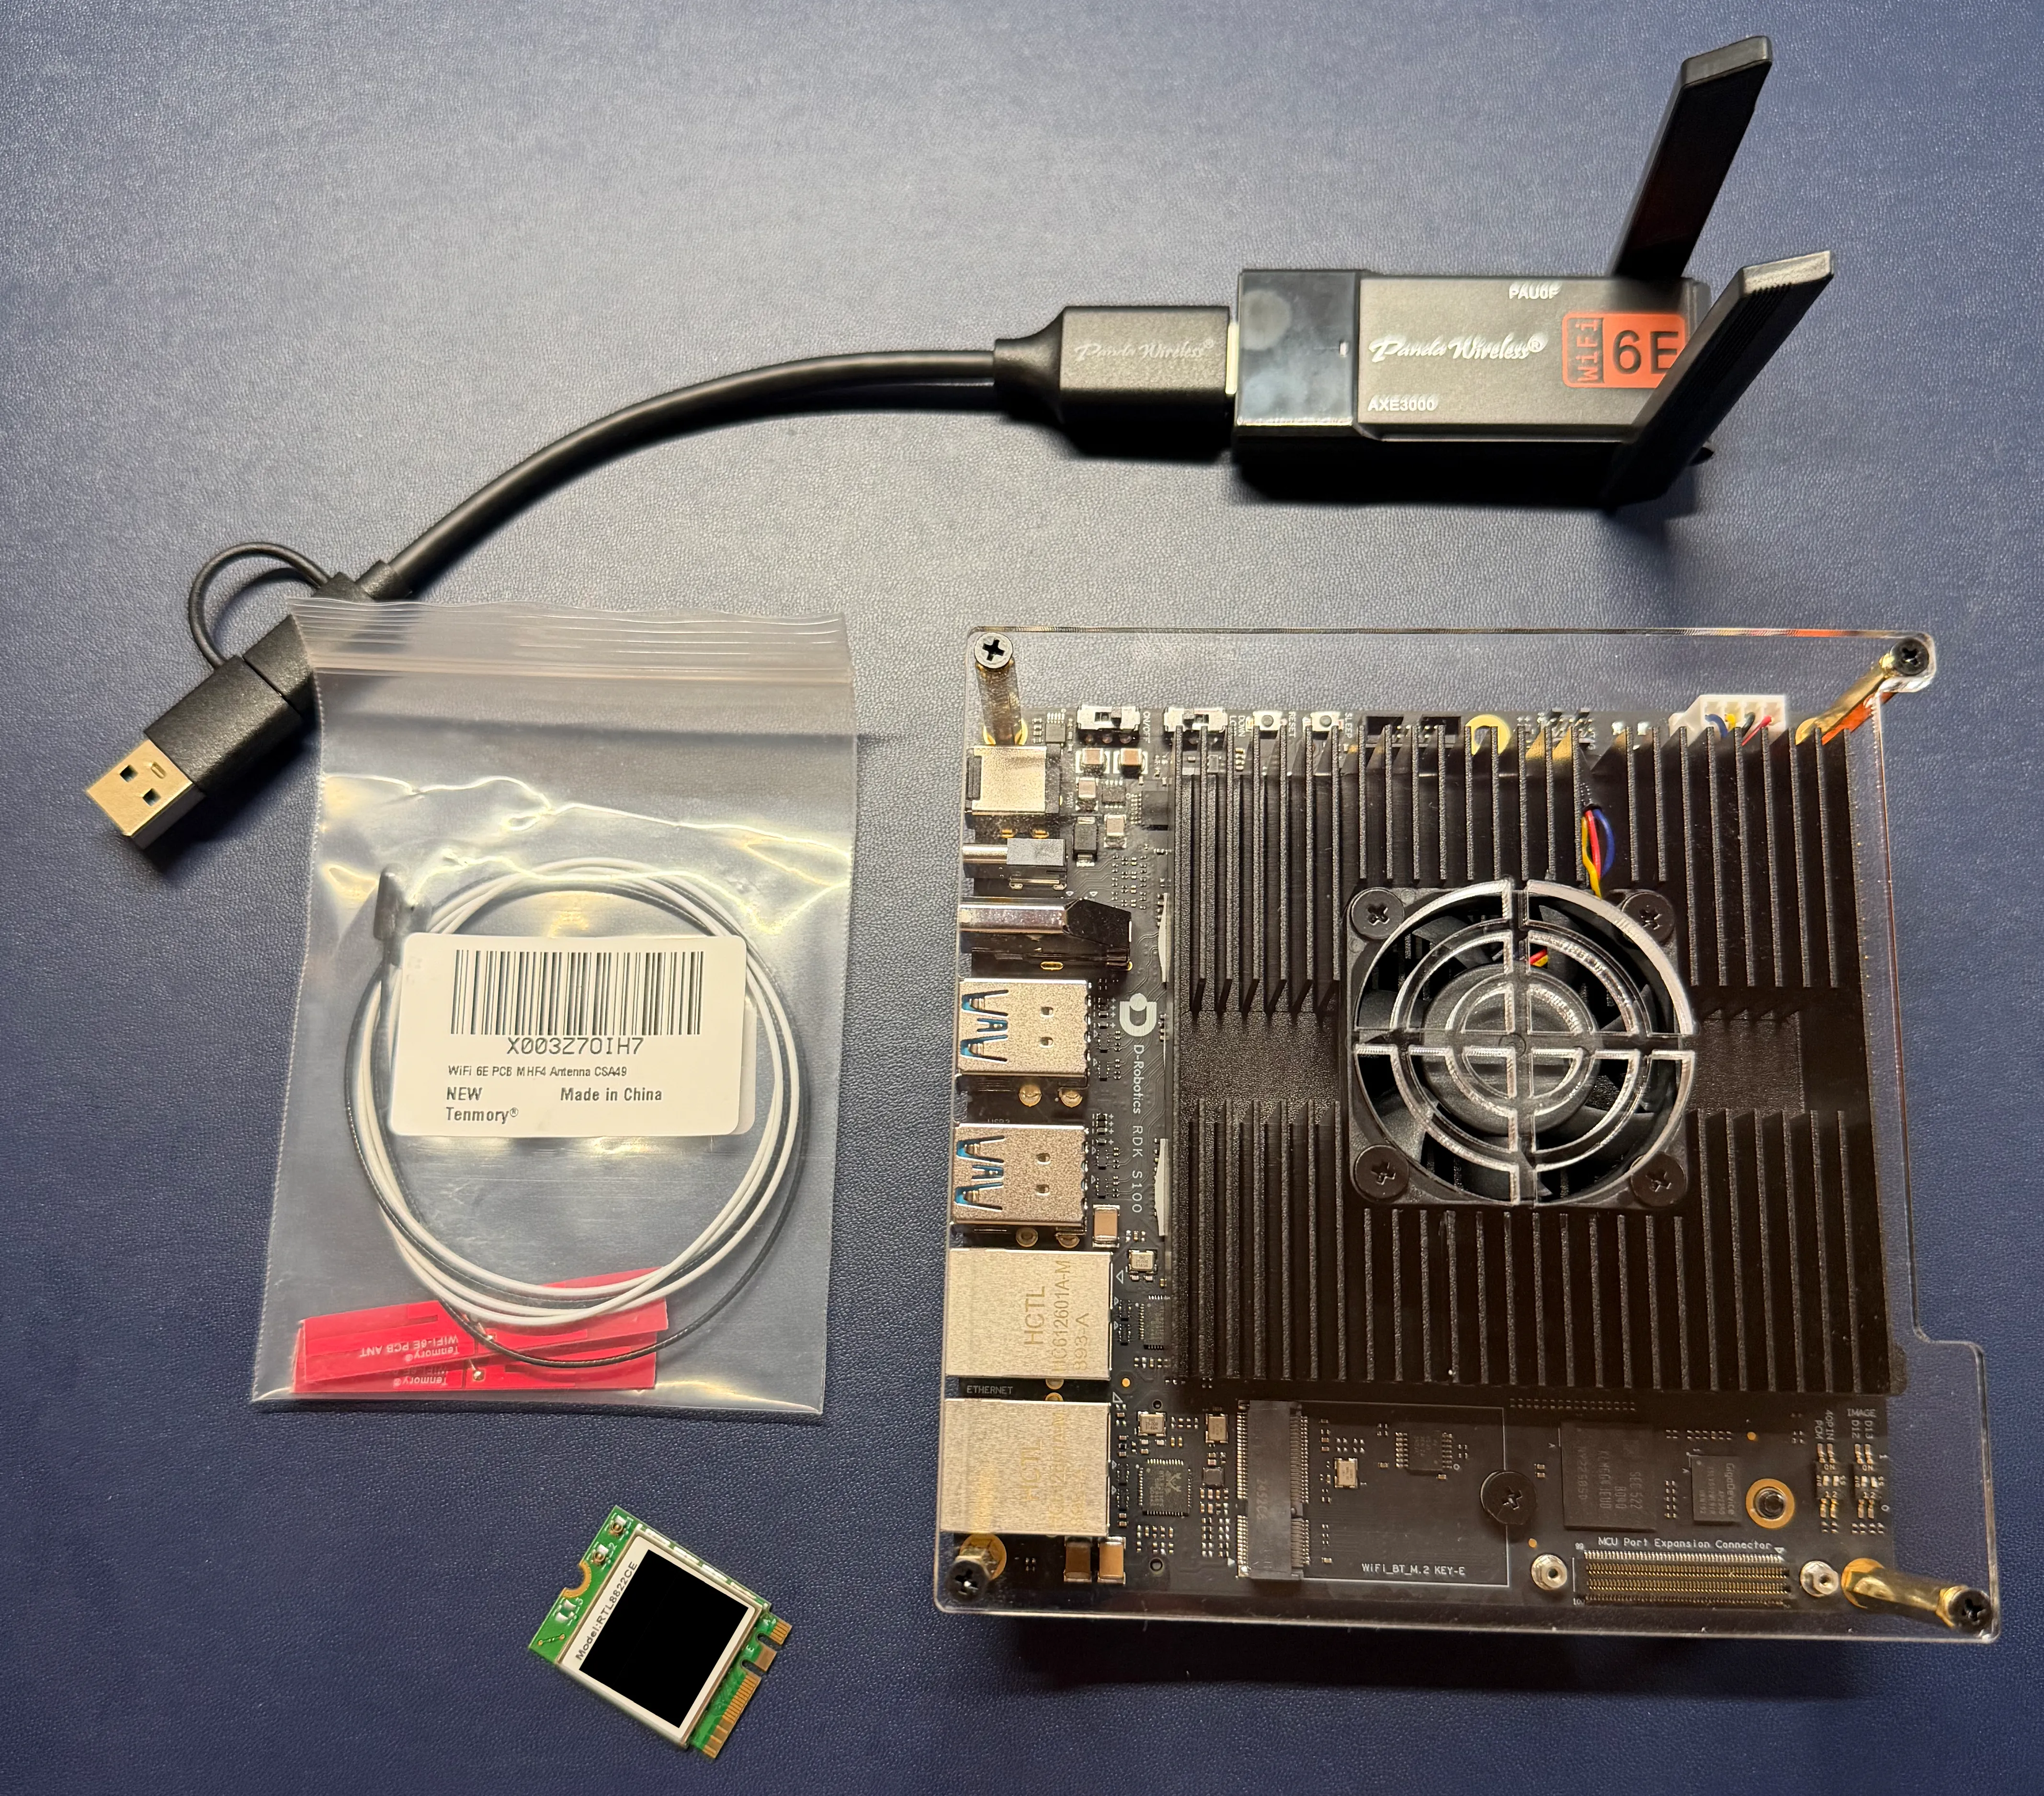
The initial RDK setup used the Panda Wireless PAU0F Wi-Fi USB module. An M.2 wireless module wasn’t available yet, and there weren’t any convenient ethernet connections for the local network. The adapter is retained as a backup option for Wi-Fi access at remote offices.
USB Wi-Fi adapters have clear disadvantages on the RDK, so they aren’t a permanent solution. The most important issue is that the RDK doesn’t include drivers for USB Wi-Fi adapters. On Linux, this adds complexity and maintenance because you have to compile the drivers yourself during initial setup, and every time the Ubuntu kernel updates.
Documentation for setting up and maintaining the driver for the Panda Wireless PAU0F Wi-Fi USB module, as well as other drivers that aren’t included with the RDK S100P, is available in the following topics:
The other issue is that the adapter takes up a lot of physical space outside the RDK, including a USB port that is in high demand. When plugged directly into a USB port on the RDK, the adapter partially blocks neighboring ports, so a USB extension cable is required.
Connection sharing §
Connection sharing from your development machine to the ethernet port on the RDK is often the easiest and most reliable way to manage and develop on the RDK. The development machine can remotely access the RDK and provide internet access without the need to set up Wi-Fi on the RDK or plug it into an ethernet port on the local network.
Unfortunately, corporate environments and shared networks often block internet connection sharing. When connection sharing isn’t blocked, it’s also a good travel option. Some portable routers can provide similar results and circumvent these limitations, but they require extra hardware and setup.
M.2 wireless module §
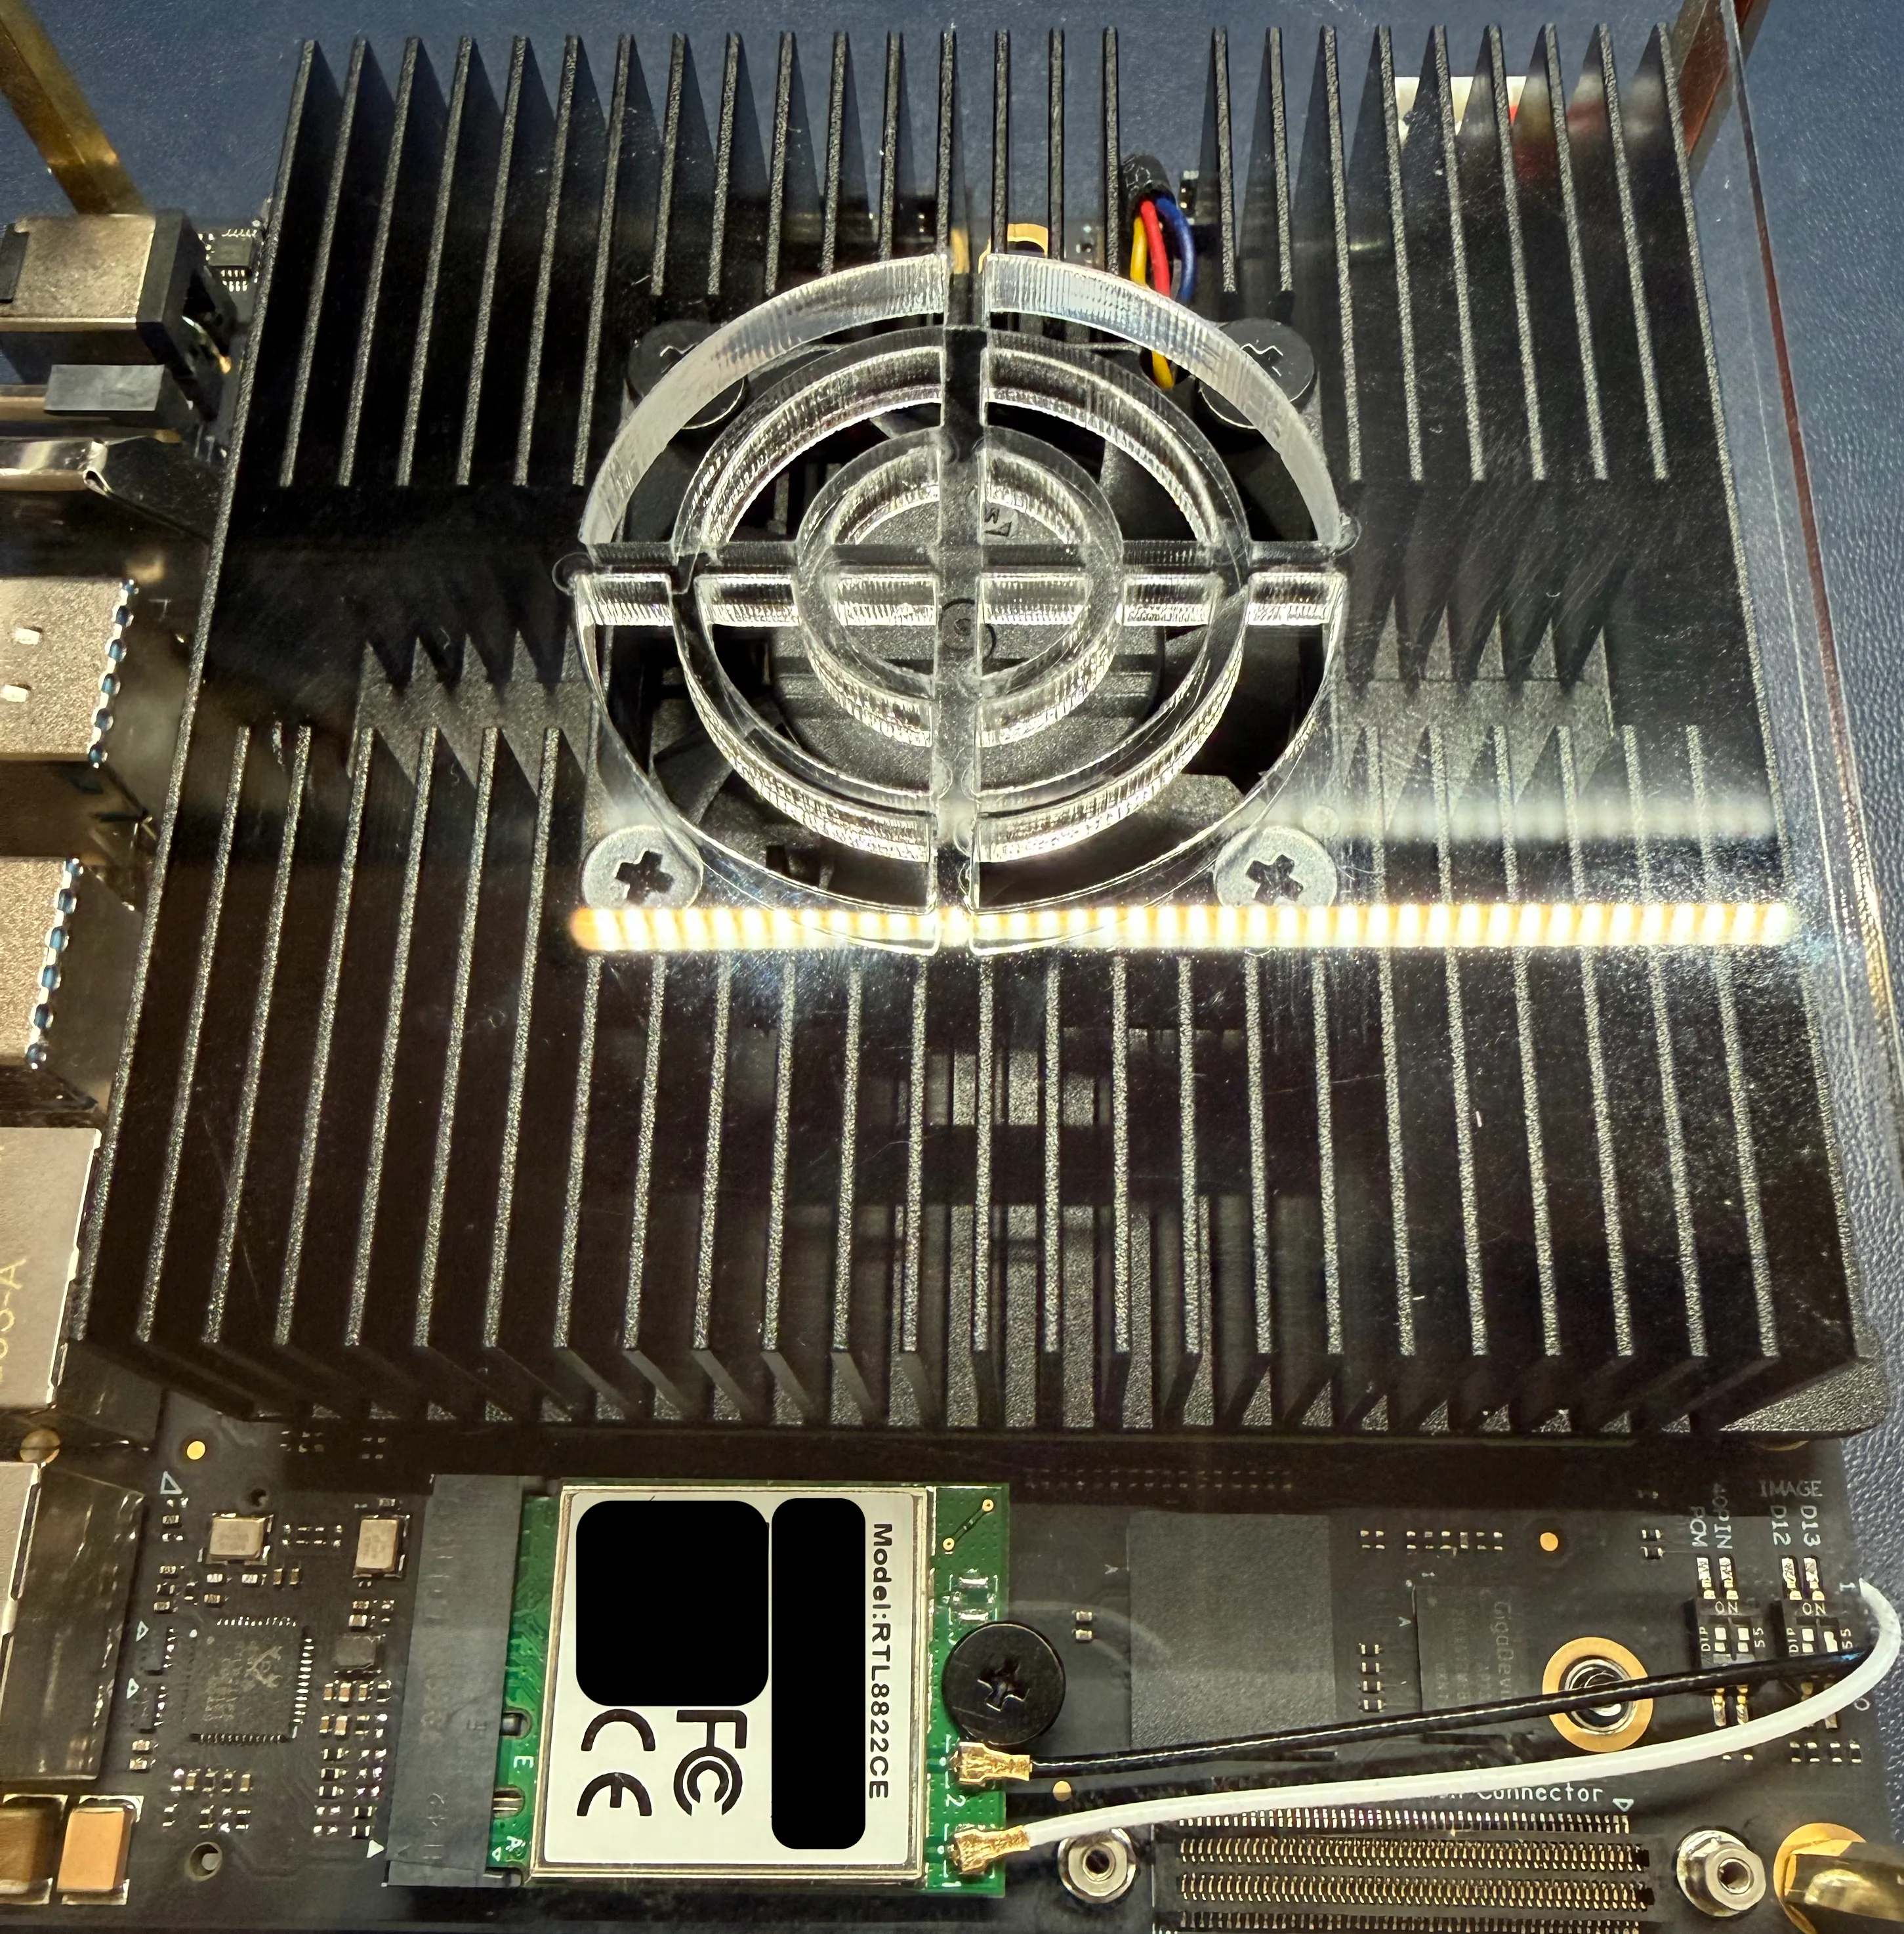
An M.2 wireless module is the best connection type to use for Wi-Fi and Bluetooth connectivity on the RDK. The robot build uses the SEED Studio RTL8822CE M.2 module with a Tenmory FPC PIFA antenna and MHF4 connectors. The RDK includes built-in drivers for M.2 wireless cards and an M.2 socket, so the module doesn’t consume external space or a USB slot, and doesn’t require any driver setup.
The only challenge was mounting the antennas without a robot chassis. There isn’t much space on the small plastic plates that come with the RDK, so the antennas are taped in a spiral shape on opposite plates, with the adhesive lead mounts positioned away from metal.
In a large robot chassis, long antenna leads might work well because there’s more space to separate them. For smaller enclosures, or when working without an enclosure during development, use much smaller antennas that include adhesive mounts for the leads.
Remote access §
We perform most development and management tasks on the RDK S100P using SSH and remote desktop software. SSH is set up on the RDK by default, but remote desktop software is not. Serial console login is also available for scenarios where remote login or direct OS login isn’t available. Serial login hasn’t been required on this build so far.
When logging into the RDK remotely for the first time, the RDK has the following default settings. The eth1 ethernet interface has a static IP address assigned by default, so you can reliably log into the device for the first time without having to retrieve the IP address assigned by the router using DHCP.
- User accounts:
- Standard user: Username
sunrise, passwordsunrise - Superuser (root): Username
root, passwordroot
- Standard user: Username
- Ethernet:
- eth1 (ethernet) static IP:
- Address:
192.168.127.10 - Subnet mask:
255.255.255.0 - Gateway:
192.168.127.1
- Address:
- eth0 (ethernet) dynamic IP: Assigned by the router using DHCP. Log in to the device directly to retrieve it, or check your router settings.
- eth1 (ethernet) static IP:
- Wi-Fi:
- wlan0 (Wi-Fi) dynamic IP: Assigned by the router using DHCP. Log in to the device directly to retrieve it, or check your router settings.
For more details about remote access on the RDK S100P, see Remote Login ↗ in the D-Robotics RDK Kit documentation.
Ubuntu packages and drivers §
D-Robotics configured the RDK S100P with a streamlined set of software and drivers on Ubuntu, so it performs more efficiently as a robotics platform. As a result, some drivers for consumer-focused peripherals and desktop software from the standard Ubuntu package set aren’t on the device.
Don’t install the entire standard Ubuntu package set on the RDK. Instead, install specific tools and drivers needed to deploy and run the robot’s software. If you need a set of desktop tools, consider running them on your dev machine instead of directly on the RDK. See RDK S100: Set up third-party drivers for more information about setting up drivers.
RDK configuration tool §
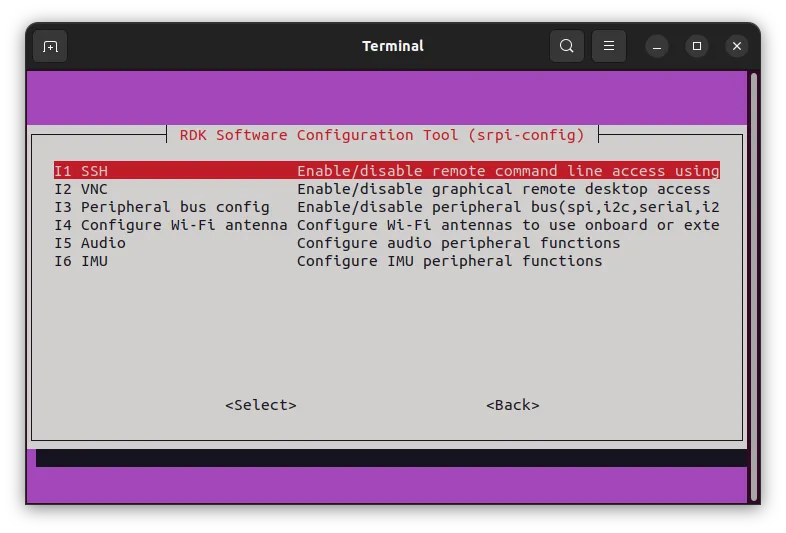
The RDK configuration tool is accessible from the Ubuntu desktop icon. The settings here are basic, so the defaults work well for this phase.
Next phase §
In phase 2, we set up the SLAMTEC Aurora S spatial perception system.